This old beauty was pulled out of someone's trash pile. It is a vintage/antique pressed back oak chair with a caned seat. The people seemed to be moving out, so I had no compunction about rescuing it from all the other things they were throwing away, thinking I could fix the seat and give it a new color. Oh, so easy!
Here is the chair I wanted to redo as well as the seat with issues.


You can see that I started this project when the azaleas were in bloom here in Northern Virginia. Life interfered with my plans. My husband became very ill and was hospitalized several times, so work on the chair was put aside. He is getting better so I'm getting back to work on it.
The spline and caning had come out of the groove and needed repair. I thought maybe some heat and moisture might make the caning pliable again so that I could add some strategically placed wood glue, hammer the spline back into the groove from whence it came, and be miraculously finished with the repairs. Ha ha!
The spline and caning had come out of the groove and needed repair. I thought maybe some heat and moisture might make the caning pliable again so that I could add some strategically placed wood glue, hammer the spline back into the groove from whence it came, and be miraculously finished with the repairs. Ha ha!
Here are the pieces of "equipment" that I used:
The heating pad is ancient, but still works fine, long after its two-year guarantee expired decades ago. Some things are just worth hanging on to!
I set the timer for 30 minutes and left chair, moisture, and heating pad to their own devices.
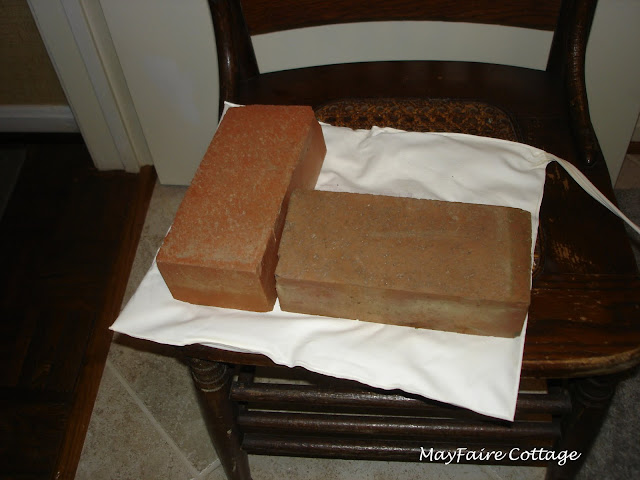
Thirty minutes ticked by—time to check on my experiment. The caning and spline were still somewhat stiff so I brought in some muscle by putting bricks on top of the heating pad (probably a very big no-no!) after I hit both parts with some more water spray and reset the timer for another 30 minutes. I went back to my detail painting on a dresser I was doing for my space in The Hummingbird’s Nest, in Lucketts, VA.
Thirty minutes ticked by—time to check on my experiment. The caning and spline were still somewhat stiff so I brought in some muscle by putting bricks on top of the heating pad (probably a very big no-no!) after I hit both parts with some more water spray and reset the timer for another 30 minutes. I went back to my detail painting on a dresser I was doing for my space in The Hummingbird’s Nest, in Lucketts, VA.

Thirty more minutes ticked by. This time some of the spline hammered in, but not the worst part at the front left corner. It still needed some more time—hit the chair again with more spray, hit the heating pad with the bricks again, and hit the reset button on the timer with my fingers (figuratively) crossed.
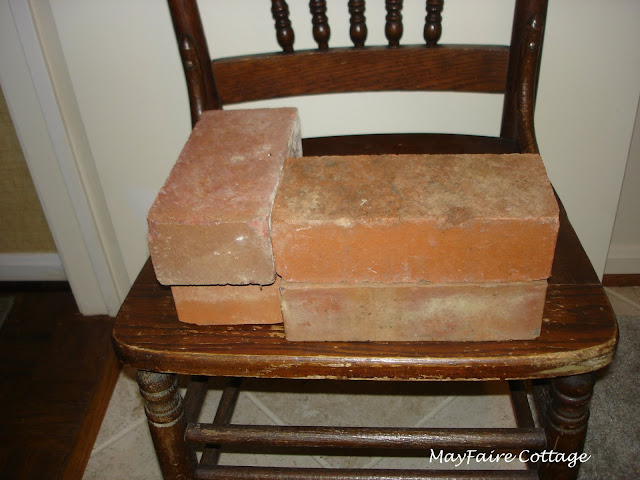
That last 30 minutes seemed to have done the trick! After adding the wood glue I went at it with my small-headed upholstery hammer, but it was found wanting. Out came the rubber hammer and I pounded and pounded, using a good-sized flat-head screwdriver to pry the stubborn corner part into its groove while hitting the spline with the rubber hammer. (Also hit my fingers several times, too!) Could hardly believe that it actually (mostly) worked! I thought it needed more weight to keep the caning and spline in the groove which necessitated another trek outside to our brick stack. (Doesn't everyone have a stack of bricks somewhere in their backyard?) After adding two more bricks, I decided that it needed to set up/dry for 24 hours.

This is what it looked like after the repairs and a couple coats of Annie Sloan Chalk Paint in Chateau Gray--yes, it does look rather greenish, but it is a great color! The repair job also tightened up the somewhat saggy seat, so it was much firmer.
Linking To:
Tweak It Tuesday Cozy Little House
Inspire Me Tuesday A Stroll Through Life
Furniture Feature Friday Miss Mustard Seed
Metamorphosis Monday Between Naps on the Porch
Amaze Me Monday Dwellings The Heart of Your Home
Share Your Style The Essence of Home
Thursday Favorite Things Blog Hop Surroundings By Debi
Amaze Me Monday Dwellings The Heart of Your Home
Share Your Style The Essence of Home
Thursday Favorite Things Blog Hop Surroundings By Debi


Wow, the chair looks so much better now! I never would have thought to use a heating pad and moisture to fix it but what a great idea!
ReplyDeleteThanks so much for your comment on my furniture I've picked up to redo lately!
Tania
Thanks for visiting, Tania, and commenting!
DeleteI've always wondered how to fix cane like that. Your tutorial was a big help. I'll remember that if I stumble upon a chair that I love and needs some repair. I love the new look you gave that chair!
ReplyDeleteI'm so happy you read my blog! I appreciate your visit and your comment!
DeleteRuth Anne - Loved this step by step process. And the heating pad! I never would have thought of that. I would love if you would share this at our Thursday Favorite Things Blog Hop. The party goes live on Wednesday evening at 9 cst at www.surroundingsbydebi.com. Hope to see you there!
ReplyDeleteThanks for visiting my blog, Debi! I did link up to the Thursday Favorite Things Blog Hop and hope to be back soon to link up again.
DeleteIt's lovely. Thank you for sharing at the Thursday Favorite Things blog hop. Hugs!
ReplyDeleteThank you--hoping to link up again soon.
DeleteYou inspired me...I must go to the thrift store! Thanks for sharing with the Thursday Blog Hop!
ReplyDeleteThanks so much--it was fun being part of the Blog Hop
DeleteThis looks amazing! I'm so glad to hear that your husband is on the mend... Thank you so much for stopping by my blog, and for your kind words. I can't wait to read more of your posts.
ReplyDeleteI appreciate you stopping by and leaving a comment! Must get on to composing a new post very soon! I don't quite have the rhythm of consistent blogging yet--I'm very new at this. Looking forward to your next post!
DeleteGenius idea to apply moisture and heat to the caning so you could repair it. I never would have thought to do that! Your chair turned out fantastic and I love the distressing you did!
ReplyDeleteThanks, Amy! It was both a fun and a nail-biting project because I wasn't sure how it would turn out! I'm enjoying reading your Canary Street Crafts blog posts--thanks for stopping by!
Delete